Because I plan on using the ImageMagick graphics library for a variety of visualizations and computer-vision applications, I've decided to write a separate chapter for it.
This is only a very preliminary introduction, including basic usage and a few simple parlor tricks. I intend to expand this chapter significantly in the future with a wide variety of applications.
There are ImageMagick examples in the the chapter on using non-Ruby programs, including its use in batch optical-character recognition.
Programming is so text-based that it's hard to imagine how it possibly conncects to the the world of visually-featured applications such as Photoshop, even though we know that such applications themselves arise from code.
But the digital representation of images – as it is with webpages, music, video and everything digitial – is simply a determined order of text characters, with bytes corresponding to each pixel and its color properties.
The ImageMagick library – which we'll connect to using the RMagick gem – provides methods for broad transformations and down-to-the-pixel operations.
ImageMagick and the RMagick gem
ImageMagick is cross-platform software that allows users to manipulate graphics at the command-line.
The RMagick gem is the wrapper that we'll use to call ImageMagick commands inside Ruby code.
Installing ImageMagick and RMagick might be the trickiest installation you'll ever have to do. An incredible number of tiny things can go slightly wrong. I don't have time to enumerate the common issues but because so many other users run into problems, there's a great wealth of information at the usual places. It may take some persistence on your part.
Consult the RMagick FAQ, Google and StackOverflow if you encounter difficulties.
Installing ImageMagick
The ImageMagick homepage provides a list of downloadable binaries for the major operating systems.
Mac OS X users: If you've been using Homebrew to install everything, I recommend going that route with ImageMagick. You may also have to install git:
> brew install git
> brew install imagemagick
Installing RMagick
Ideally, you should be able to install the RMagick Ruby gem with:
gem install rmagick
Or:
sudo gem install rmagick
But depending on how well the ImageMagick installation went for you, you might run to any number of errors. Even if it goes smoothly, the installation will take longer to complete than with other gems.
Opening and saving images
To use RMagick, we must include the library as we would any other RubyGem:
require 'rubygems'
require 'rmagick'
Reading an image file
Opening a file with RMagick is a little different than typical file-opening. We use the read method – which returns a collection – and ask for the first element:
img = Magick::Image::read("some_filename.gif")[0]The img variable now points to a Magick::Image object, which is what we'll use to invoke methods that manipulate the file. For example, the Image object's scale method will change its size based on a Float that we pass to it. The following snippet reduces the image to have size
img = img.scale(0.5)Note that the only the Image object, not the original file is actually modified. The original file is unaltered until we save img. And only then if we use the same filename as before, which will overwrite the original file.
Writing the image to disk
Let's save the file now with write, which takes in as argument a String for the filename:
img.write("another_filename.jpg")One of the nice features of ImageMagick is that it will automatically convert the image to the file format that you specify in the filename.
We can also pass a block into the write method, which allows us to modify various attributes of the saved image. The following code will save img with a quality level of 40 (out of 100):
img("another_filename.jpg").write do |f|
   f.quality = 40
end
Exercise: Open, reduce, save
Using what we've learned so far, write a snippet that opens a file, scales it to 30% of its original size, and saves it to the same filename at 60% quality.
Solution
require 'rubygems'
require 'rmagick'
Magick::Image::read(filename)[0].scale(0.3).write(filename){|f| f.quality = 0.6 }
Image attributes
RMagick can be used to determine a variety of characteristics about an image.
The most basic and frequent property we want to know about an image is its dimensions. Use the row and columns methods:
img = Magick::Image::read(filename)[0]
puts "This image is #{img.columns}x#{img.rows} pixels"Image alterations
The methods for ImageMagick are as diverse and useful as they are for commercial image editors. In some cases, such as resizing, changing to grayscale and rotation, are easily done through code and much faster for a batch group of images.
Other methods, such as cropping and adjusting contrast levels, are tougher to execute. Not in a programmatic sense. But because such photo alterations are easier when you can see as you do them and make adjustments as needed. This is easy from a graphical interface, not as much from the code editor.
Resizing methods
ImageMagick is commonly used on websites to dynamically generate thumbnails from uploaded images.
#thumbnail
This is an easy and quick method for creating thumbnails. Pass in either a width and height in pixels. Or a single Float that represents the percentage:
i = Magick::Image.read(file).first
i.thumbnail(i.columns*0.06, i.rows*0.06).write("#{file}-thumb.jpg")
I often run the following script to create thumbnails of all the images in a directory:
require 'rubygems'
require 'rmagick'

Dir.glob("*.jpg") do |fname|
   img = Magick::Image.read(fname)[0]
   img.thumbnail(0.10).write("#{fname}-thumb.jpg")
end
#resize_to_fill
When you need an image that fits a specified dimension and ratio, resize_to_fill can be used without distorting the original aspect ratio. This is useful when making, for example, a square thumbnail with 100 pixel sides even if the original image is not a square:
i = Magick::Image.read(file).first
i.resize_to_fill(100,100).write("#{file}-square-thumb.jpg")
A third argument can be passed in to specify from which region to anchor the crop. The accepted variable are constants of Magic::GravityType, such as NorthGravity to specify the top-center region and SouthEastGravity to specify the bottom-right region (see the complete list)
Here's the method call to specify the bottom-left region:
i = Magick::Image.read(file).first
i.resize_to_fill(100,100, Magick::SouthEastGravity).write("#{file}-thumb.jpg")
Transformations and filters
Once you have down the concept of opening, altering, and writing to a new image file, then doing transformations with RMagick is quite easy. It's just a matter of reading the documentation for the available functions.
There's too many methods to cover in this section, but they're all pretty easy to use and cover the gamut from the basic – including image rotation – to the artsy tools under Photoshop's Filter menu.
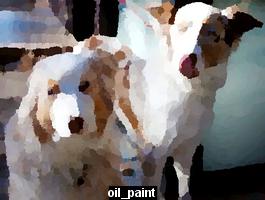
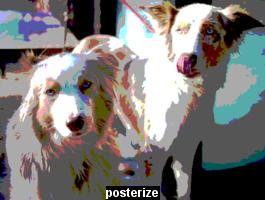
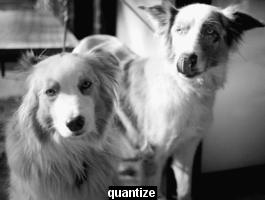
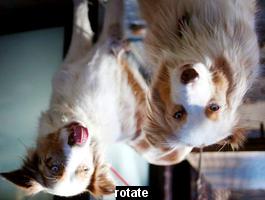
Here's a sampling of transformations including the method calls:
|
 |
|
 |
|
 |
|
 |
|
 |
|
 |
|
 |
|
 |
|
 |
|
 |
|
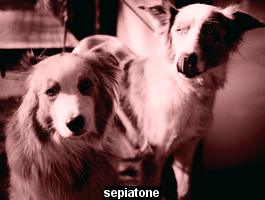 |
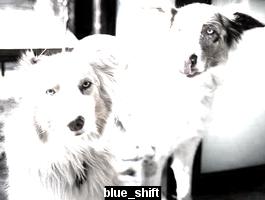
And just as a demonstration of how writing code can help you write more code, here's the script I used to generate the above table:
require 'rubygems'
require 'rmagick'
RMAGICK_HOME = 'http://www.imagemagick.org/RMagick/doc/'
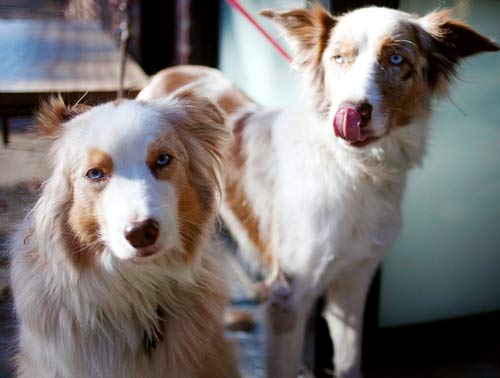
FNAME = "data-hold/dogs.jpg"
OPS = [
[['blue_shift', 3], 'image1.html'],
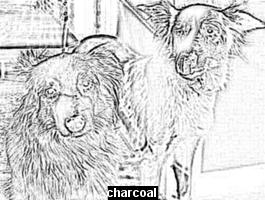
[['charcoal'], 'image1.html'],
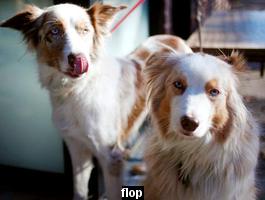
[['flop'], 'image2.html'],
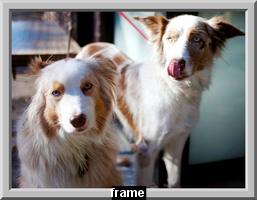
[['frame'], 'image2.html'],
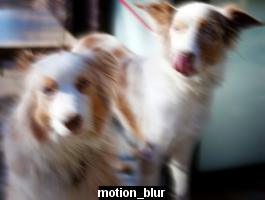
[['motion_blur', 0, 10, 30], 'image2.html'],
[['normalize'],'image3.html'],
[['oil_paint', 6], 'image3.html'],
[['posterize'], 'image3.html'],
[['quantize', 256, Magick::GRAYColorspace], 'image3.html'],
[['rotate', 180], 'image3.html'],
[['sepiatone'], 'image3.html'],
]
WIDTH = 300
HEIGHT = 200
# the Magick class used for annotations
gc = Magick::Draw.new do |g|
g.fill = 'white'
g.font_weight = Magick::BoldWeight
g.gravity = Magick::SouthGravity
g.pointsize = 12
g.undercolor = 'black'
end
# the base image
img = Magick::Image.read(FNAME)[0].strip!
OPS.each do |op_arr|
ops = op_arr[0]
url = "#{RMAGICK_HOME}#{op_arr[1]}"
ximg = img.send(*ops).resize_to_fit(WIDTH, HEIGHT)
# label the image with the method name
lbl = Magick::Image.new(WIDTH, HEIGHT)
gc.annotate(ximg, 0, 0, 0, 0, ops[0])
# save the new image to disk
new_fname = "#{FNAME}-#{ops[0]}.jpg"
ximg.write((new_fname))
# output HTML for the chapter
puts txt = <<HTML
<tr>
<td><pre><code>img.#{ops[0]}#{'(' + ops[1..-1].join(', ')+')' if ops.length > 1}</code></pre></td>
<td><div class="imgwrap alone"><img src="#{new_fname}" alt="#{ops[0]}"></div></td>
</tr>
HTML
endPixel operations
Sometimes we want to examine or manipulate a specific region of an image.
The Magick::Pixel class describes the base building block of an image. Operations that slice and rearrange an image will involve specifying a rectangle of pixels to work with.
The Pixel object
For pictures that are in RGB mode, each pixel object has methods red, green, blue and alpha, which return an integer describing the pixel's intensity for that color (or opacity, in alpha's case).
For the 2x2 pixel image pictured here, I use the each_pixel method to iterate across the image and read from each Pixel object:
require 'rubygems'
require 'rmagick'

Magick::Image.read('rgb-pixel.png')[0].each_pixel do |pixel, col, row|
  puts "Pixel at: #{col}x#{row}:
  \tR: #{pixel.red}, G: #{pixel.green}, B: #{pixel.blue}"
end
#get_pixels
To specify a rectangular subset of pixels, use get_pixels. The first two arguments are the x and y coordinates of the rectangle's top-left corner. The third and fourth arguments are the width and height of the rectangular region (RMagick docs).
The Pixel objects will be returned in a flat array, starting from left to right, top to bottom.
To get an array of Pixel objects in the 200x50-pixel rectangle that begins at coordinates (0,20):
img.get_pixels(0,20, 200, 50)#dispatch
For the constitute method, which we will cover next, we need the array of pixels as integers, not Pixel objects.
The following two method calls are equivalent:
img.get_pixels(0,20, 200, 50).map{|p| [p.red, p.green, p.blue]}.flatten
img.dispatch(0, 20, 200, 50, "RGB")
#constitute
To create a new Magick::Image object from a subset of another image's pixels, use constitute in combination with dispatch (RMagick docs).
The constitute method takes in four arguments:
- width of the new image
- height of the new image
- a string describing the new image's colorspace, e.g. 'RGB'
- an flat array of pixel numbers. You cannot pass in an array of Pixel objects; so you'll use dispatch instead of get_pixels.
To create a new image from the img object, using the pixel region starting from coordinates (30,80), 200 pixels wide by 100 pixels high:
x = 30
y = 80
width = 200
height = 100
sub_img_pixels = img.dispatch(x, y, width, height, "RGB")
new_img = Magick::Image.constitute(width, height, "RGB", sub_img_pixels)
#composite
The composite method (which I constantly mix up with constitute) allows you to stick one image atop another. It takes in four arguments (RMagick docs):
- the source image to be placed upon the Magick::Image that invoked composite (i.e. the destination image)
- the x-coordinate on which the source image will be placed.
- the y-coordinate on which the source image will be placed (think of it as the top-left corner).
- The CompositeOperator, which designates how you want to layer the two images together. For simplicity's sake, I use OverCompositeOp, which stacks the source image atop the destination image. You can see the full list of composite operators here.
Riffing off of the previous snippet using constitute, here's how to layer a chunk of an image on top of the original image:
x = 30
y = 80
width = 200
height = 100
sub_img_pixels = img.dispatch(x, y, width, height, "RGB")
new_img = Magick::Image.constitute(width, height, "RGB", sub_img_pixels)

img = img.composite(new_img, 0, 0, CompositeOperator)
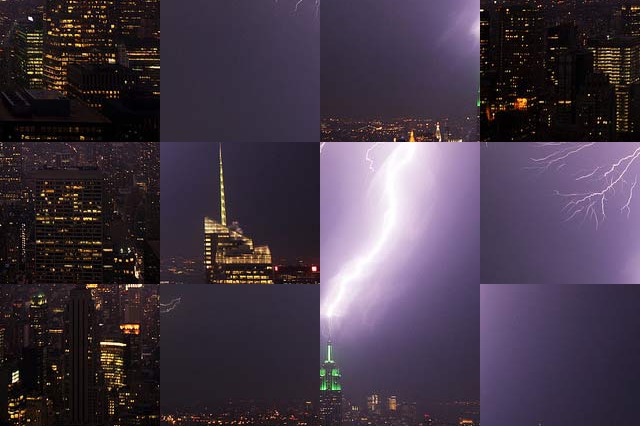
Exercise: Create a random jumble of an image
Using the pixel-manipulating methods we just covered – namely: dispatch, constitute, and composite, write a script that:
- Divides a given image into a 4x3 tile set of equally-sized rectangles.
- Creates a new image in which the 12 tiles are randomly arranged.
- Saves the image to disk as a new file
Hint: Create a new Magick::Image that is the same dimensions as the image to be shuffled.
Solution
I use some fancy modulo and division to avoid dealing with two-dimensional arrays. Sketch it out on paper if the math doesn't make sense. Assume that:
COLS = 4
ROWS = 3
- Given index 0 in a one-dimensional array, its spot in a two-dimensional array would be (0,0), which is also: (0 % COLS, 0 % COLS)
- Given index 3 in a one-dimensional array, its spot in a two-dimensional array would be (3,0), which is also: (3 % COLS, 3 / COLS)
- Given index 14 in a one-dimensional array, its spot in a two-dimensional array would be (2,4), which is also: (14 % COLS, 14 / ROWS)
require 'rubygems'
require 'rmagick'

FNAME = "data-hold/lightning-esb.jpg"
TILE_COLS = 4
TILE_ROWS = 3

TILE_WIDTH = img.columns/TILE_COLS
TILE_HEIGHT = img.rows/TILE_ROWS

img = Magick::Image.read(FNAME)[0]
# create a new empty image to composite the tiles upon:
new_img = Magick::Image.new(img.columns, img.rows)

# tiles will be an array of Image objects
tiles = (TILE_COLS * TILE_ROWS).times.inject([]) do |arr, idx|
  arr << Magick::Image.constitute(tile_width, tile_height, 'RGB',
          img.dispatch( idx%TILE_COLS * TILE_WIDTH,
                        idx/TILE_COLS * TILE_HEIGHT,
                        TILE_WIDTH, TILE_HEIGHT, 'RGB' ))
end

# Basically go through the same kind of loop, but using composite
tiles.shuffle.each_with_index do |tile, idx|
  new_img.composite!( tile, idx%TILE_COLS * TILE_WIDTH,
                      idx/TILE_COLS * TILE_HEIGHT,
                      Magick::OverCompositeOp)
end

new_img.write("#{FNAME}-shuffle.jpg")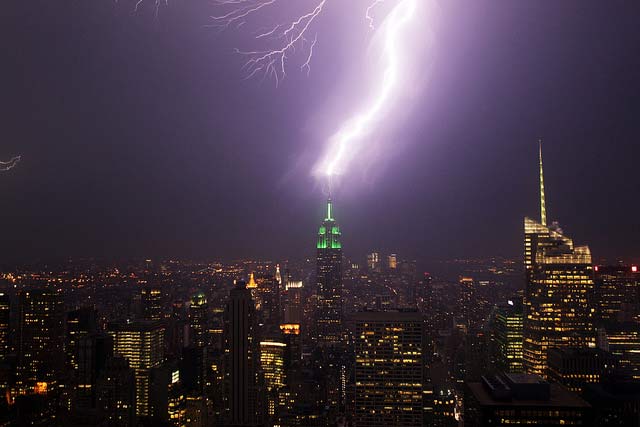
Drawing
RMagick includes methods for drawing so you can programmatically create your own graphs and visualizations. Before you do that, though, I suggest checking out the various gems (such as gruff) that use RMagick for data visualizations, rather than writing your own wrapper.
For now, here are some basic methods for drawing arbitrary lines and making annotations for your images.
Annotations
To be completed at a later date. View the RMagick documentation for annotate.
Applications
Doing complex graphic manipulations beyond ImageMagick requires an in-depth knowledge of mathematics and linear equations. Before we get to that stage, though, there are plenty of libraries and external APIs for us to incorporate.
Detecting faces with Face.com

Facial recognition is one of the hot technologies, especially for social websites. The currently-available libraries take some effort to set up. But if you need a ready-to-use solution, Face.com provides a handy service in which you send it an image or image URL. It then responds with a XML or JSON file that describes the number, positions, and characteristics of the faces detected.
The setup is easy. Create an account on the Face.com's developer page. You will be given an API key and an API secret, which acts as user/password authentication every time you make an API call. At the time of writing, Face.com's API allowance is generous enough for testing: 5,000 detections per hour.
The faces.detect call
The basic call involves providing the Face API with an image, either a link or an upload:
http://api.face.com/faces/detect.json&api_key=APIKEY&api_secret=APISECRET&urls=http://yoursite.com/images/1.jpg
The optional settings include how aggressive the face detection is and whether you want other attributes, such as whether the face's lips are sealed, open, or smiling.
The faces.detect response
If you specify the .json format, this is what the response data will look like:
{
    "photos": [{
        "url": "http:\/\/farm3.staticflickr.com\/2751\/4204160273_8aa8a03fab_b.jpg",
        "pid": "F@b44bf",
        "width": 1024,
        "height": 682,
        "tags": [{
            "tid": "TEMP_F@.14_14.22_0_0",
            "recognizable": false,
            "threshold": null,
            "uids": [],
            "gid": null,
            "label": "",
            "confirmed": false,
            "manual": false,
            "tagger_id": null,
            "width": 4.3,
            "height": 6.45,
            "center": {
                "x": 40.14,
                "y": 14.22
            },
            "eye_left": {
                "x": 39.87,
                "y": 12.6
            },
            "eye_right": {
                "x": 41.4,
                "y": 12.99
            },
            "mouth_left": {
                "x": 39.96,
                "y": 15.77
            },
            "mouth_center": {
                "x": 40.48,
                "y": 15.78
            },
            "mouth_right": {
                "x": 40.87,
                "y": 16.03
            },
            "nose": {
                "x": 40.92,
                "y": 14.31
            },
            "ear_left": null,
            "ear_right": null,
            "chin": null,
            "yaw": 38.48,
            "roll": 9.68,
            "pitch": 11.65,
            "attributes": {
                "face": {
                    "value": "true",
                    "confidence": 65
                }
            }
        }],
    "status": "success",
    "usage": {
        "used": 1,
        "remaining": 4999,
        "limit": 5000,
        "reset_time_text": "Sun, 04 Dec 2011 00:10:18 +0000",
        "reset_time": 1322957418
    }
}
The JSON includes an array of photos, each of which includes an array of tags. Each tag includes the x,y coordinates for the eyes, nose and mouth, as a percentage of the width and height of the image.
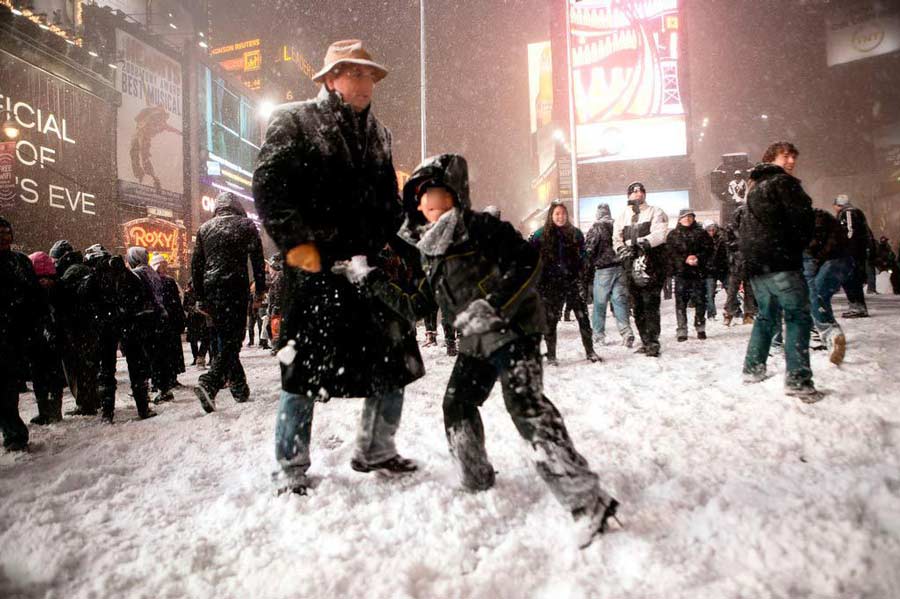
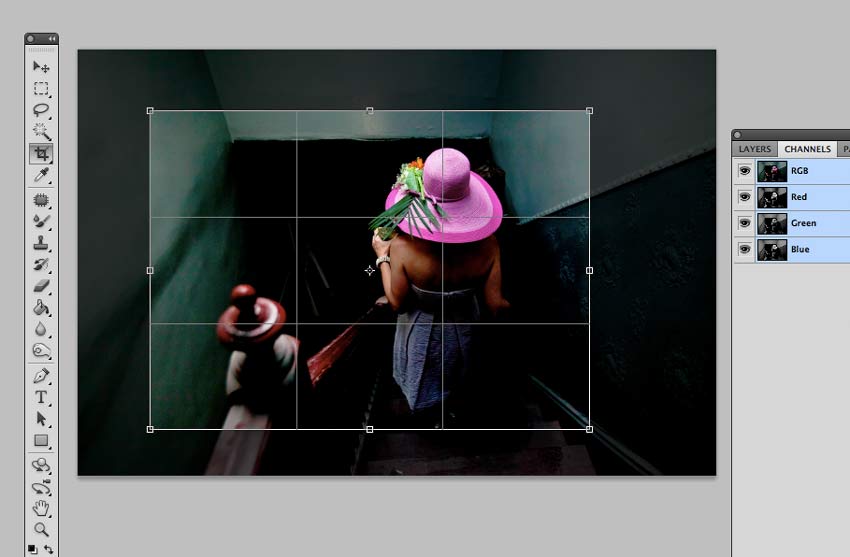
For the image that is used as an introduction to this chapter, in which the two main faces are blurred, I used the the coordinates of the left and right eyes, and the right side of the mouth to specify determine the area to blur:
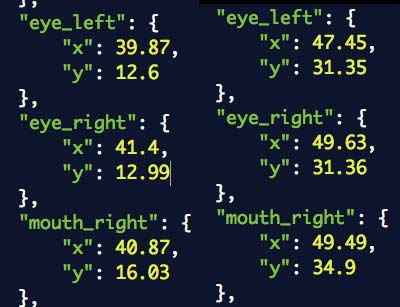
In Photoshop, this is how the coordinates roughly line up on the image (click here to see the original image on Flickr):
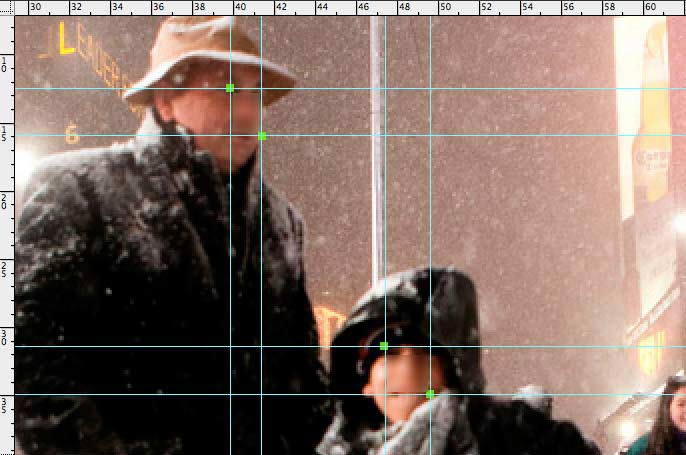
With the spatial data given by the Face API, we have everything we need to programmatically alter the facial areas of the images.
Exercise: Automated facial-redaction
Write a program that, on any given image:
- Detects faces and their positions with Face.com's API
- Creates a copy of the source image with the faces blurred out.
This is an atypical use case for a service that was designed to identify faces, not obscure them, but it will test your knowledge of how to make and parse a standard API request and RMagick's constitute, compose, and transformation methods.
Solution
The general strategy is to define the rectangle of pixels that covers a detected face. I use the eye_left for the top-left corner of the rectangle. And I use the x-coordinate of eye_right and the y-coordinate of mouth_right to determine the bottom-right corner of the rectangle. From there, it's easy to derive the width and height of the rectangle used the constitute method.
I keep my API key and secret in an external two-line file, which is read at the beginning of the script.
require 'rubygems'
require 'restclient'
require 'crack'
require 'rmagick'

URL_FACE = "http://api.face.com/faces/detect.json"
URL_IMAGE = 'http://farm3.staticflickr.com/2751/4204160273_8aa8a03fab_b.jpg'
apikey,apisecret = File.open(File.expand_path("~/proj/face/secrets.txt")).readlines

#####  make API call
response = RestClient.get(URL_FACE,
  :params=>{:api_key=>apikey, :api_secret=>apisecret, :urls=>URL_IMAGE})

tags = Crack::JSON.parse(response)['photos'][0]['tags']

if tags.length > 0
  # download the image locally first, and then read it
  fname = File.basename(URL_IMAGE)
  File.open(fname, 'w'){|f| f.write(RestClient.get(URL_IMAGE))}
  img = Magick::Image.read(fname)[0]
  img_dim = [img.columns, img.rows]

  tags.each do |tag|
    face_topleft = {
      'x' => img.columns * tag['eye_left']['x']/100.0,
      'y' => img.rows * tag['eye_left']['y']/100.0
    }

    face_width = img.columns * tag['eye_right']['x']/100.0 - face_topleft['x']
    face_height = img.rows * tag['mouth_right']['y']/100.0 - face_topleft['y']

    new_face_img =  Magick::Image.constitute(
      face_width, face_height,
      "RGB",
        img.dispatch( face_topleft['x'], face_topleft['y'],
          face_width, face_height, 'RGB')
     )

     img.composite!( new_face_img.gaussian_blur(0, 5),
        face_topleft['x'], face_topleft['y'], Magick::OverCompositeOp)
  end

  img.write("#{fname}-blurred.jpg")
end
More to come in future updates...